


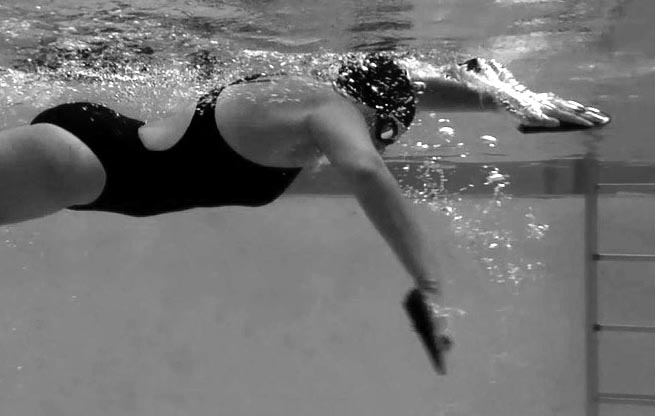
Goal: The pull requires a high elbow with your elbow remaining forward and close to the surface as the hand (fingertips first) and forearm drop straight down (elbow remaining at the surface). The stroke then pulls completely through to the thigh. The elbow straightens at the thigh to “hold the water” as long as possible. The wrist can bend back to “push” the water under the thigh. Lastly, lift the elbow out of the water first.
Self Analysis: Video yourself from front and the side for future reference
Sensory Drills:
Use a snorkel and power bags on your feet with a pull only
Comprehend: The bags will slow you down so you can FEEL the inefficiency of each of these “wrong” drills.
One of these Sensory Drills may feel natural like your normal stroke… that is NOT a good thing
Drill 1:
Pull-Only with “leading elbows” by pulling your elbow back through the water; the hand trails behind
FEEL: You have NO power to move forward
Drill 2:
Pull-Only with “straight elbows” by never bending your elbows at all
FEEL: This is hard on your shoulders and elbows, and pushes your body up into the air at the catch. (It may feel strong because it is more effort but you won’t move faster)
Drill 3:
Pull-Only with 90 degree bent wrist through the entire stroke
FEEL: Now you are not using your forearms, just your “hand” paddles for less power.
Drill 4:
Pull-Only with your hands making an exaggerated ‘S’ stroke way under your body (past your center line)
FEEL: This causes you to swim crooked and causes you to lose power as you cross your center line
Drill 5:
Pull-Only with your hands entering the water out wide (away from the body in the front) and then ‘S’ stroke across your center line
FEEL: Setting up your catch out wide is like doing pull-ups with your hands as far apart on a chin-up bar as possible: it can be done but it is weak and strenuous. It also forces an ‘S’ stroke instead of a straight stroke.
Finds: Review your recent video of how you normally swim and compare to our photos to find your problems
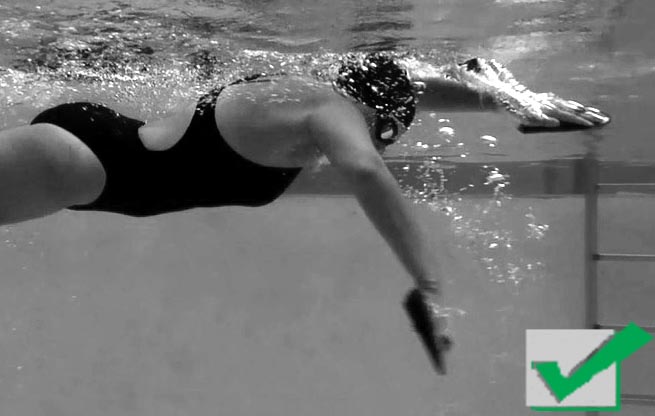
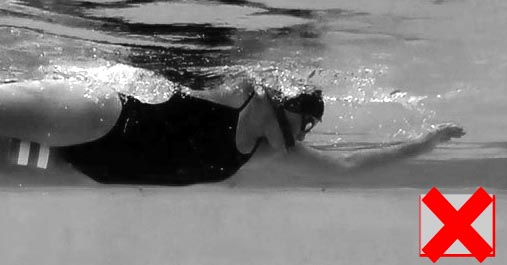
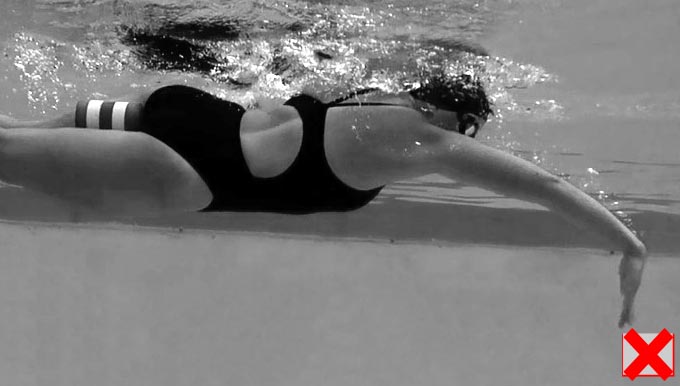
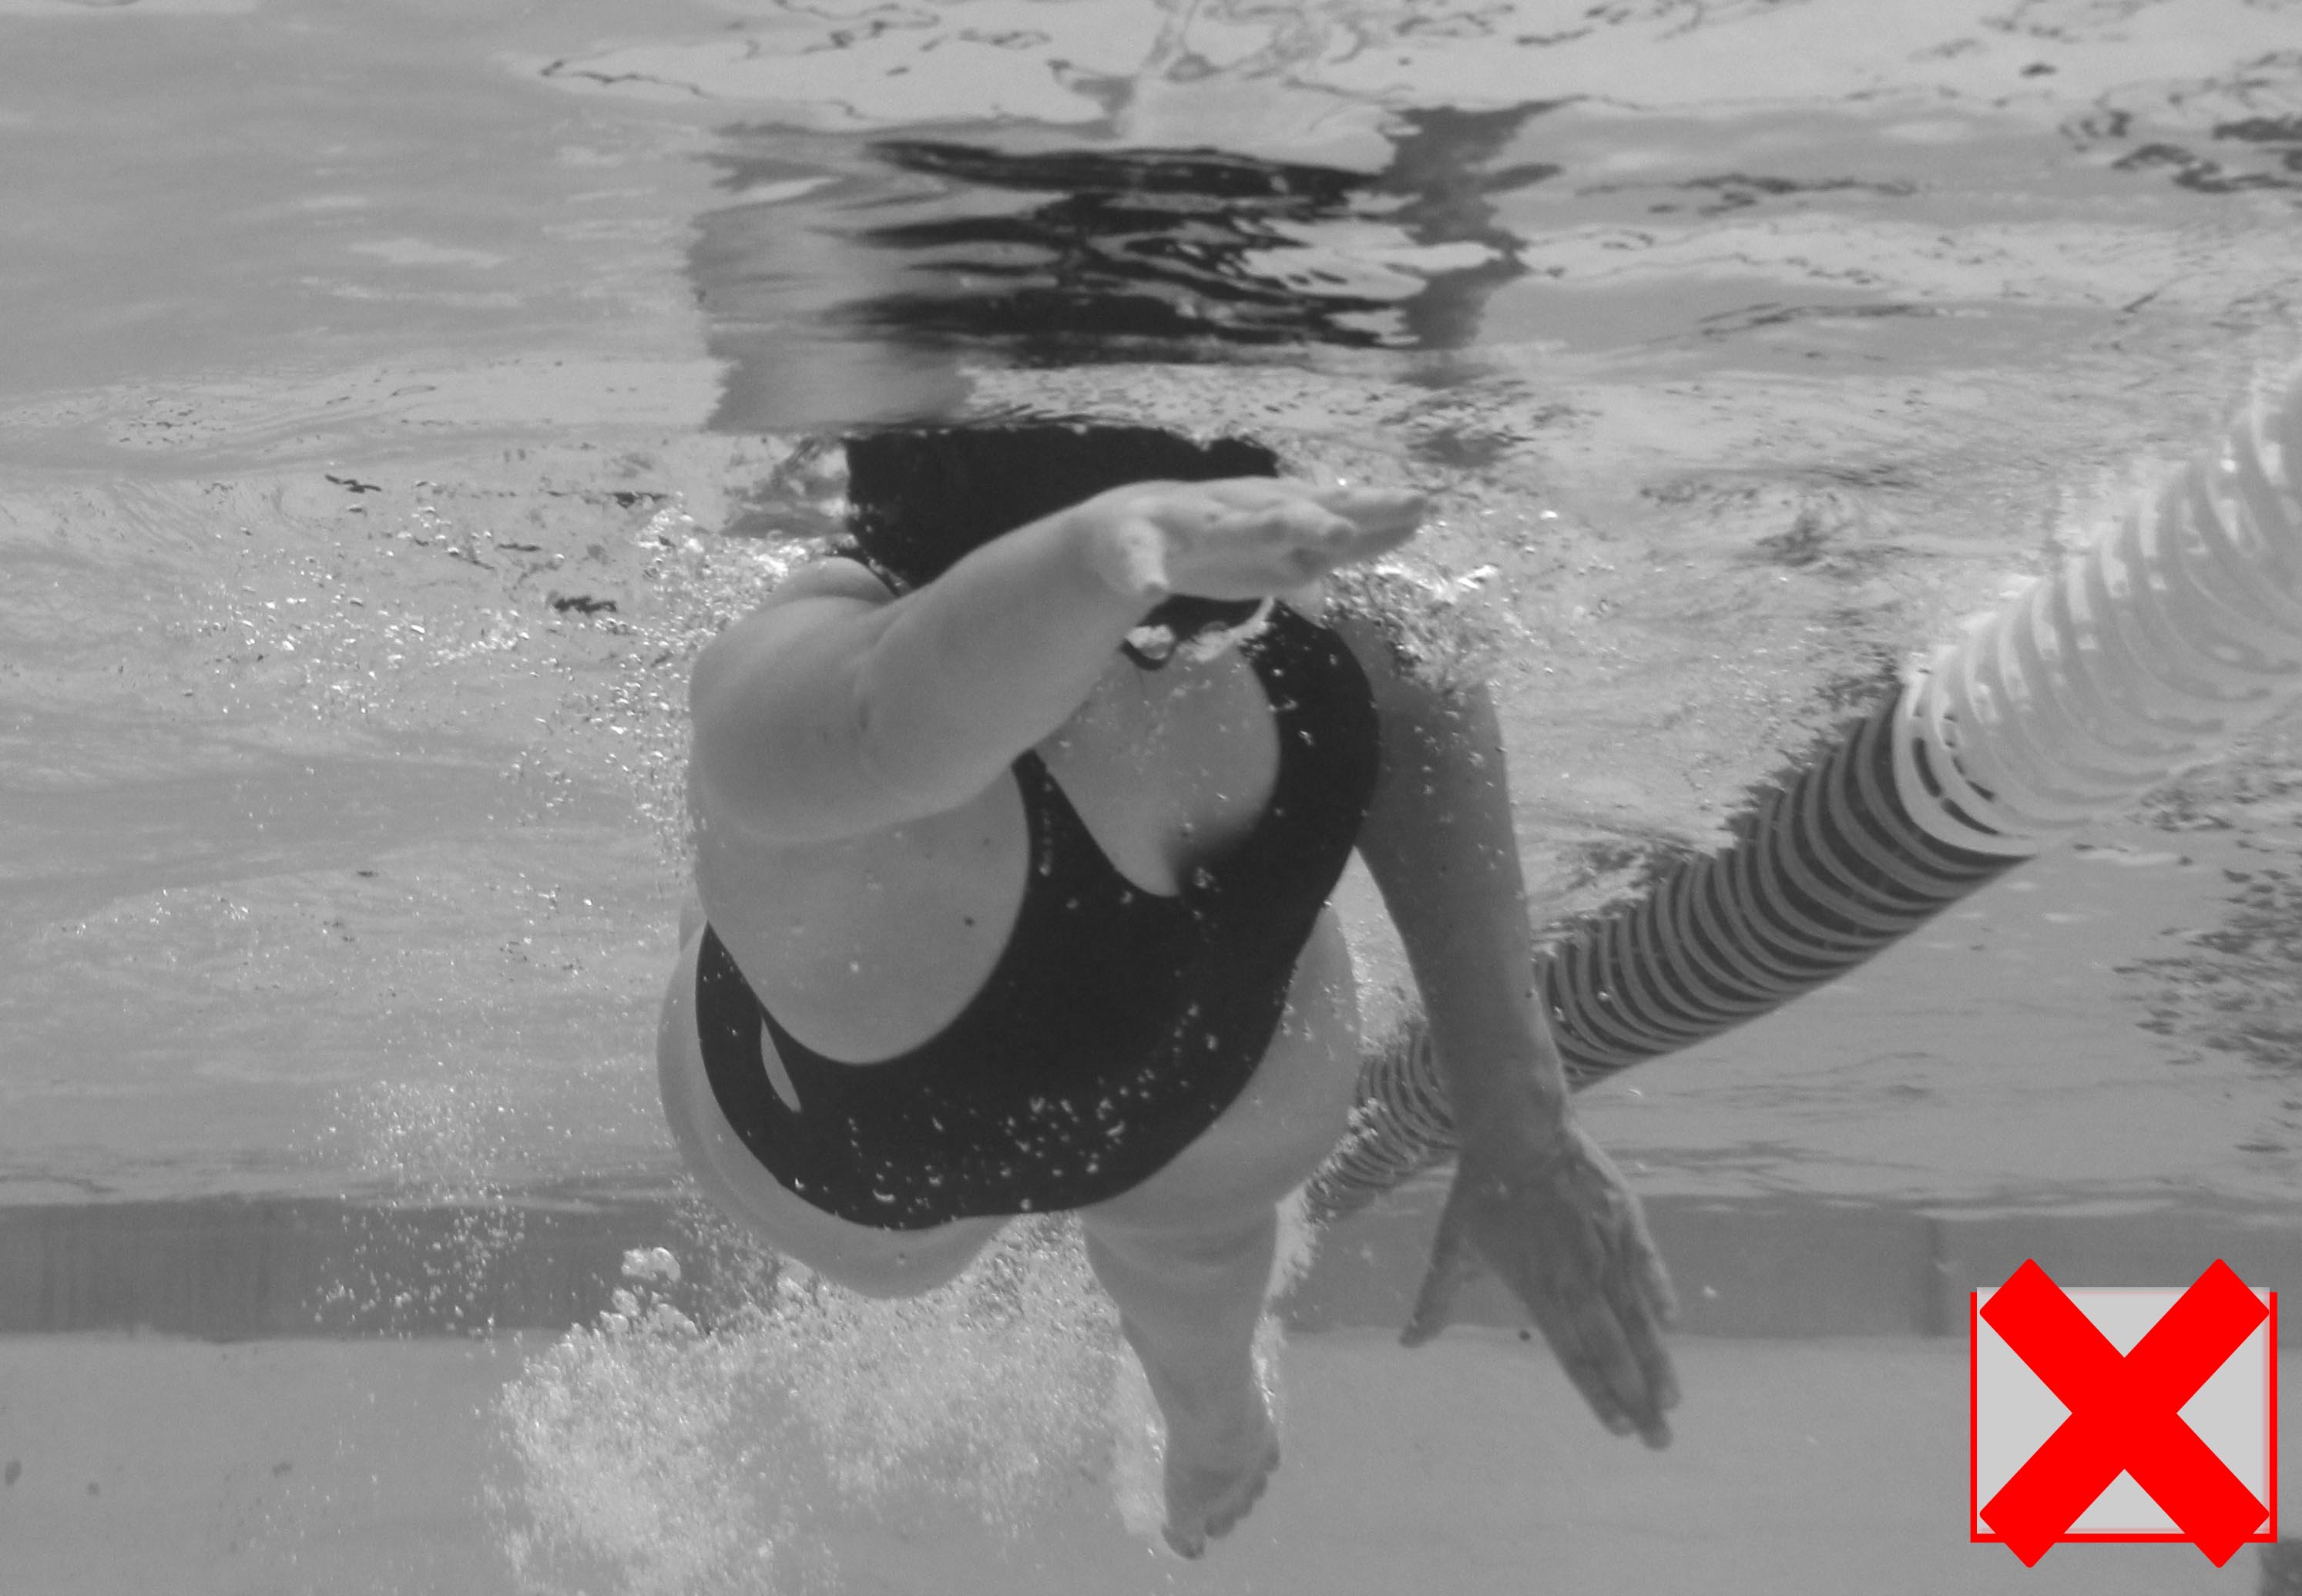
- Do you stroke with a “dropped elbow” in which you start to stroke by bending your elbow back (even slightly)?
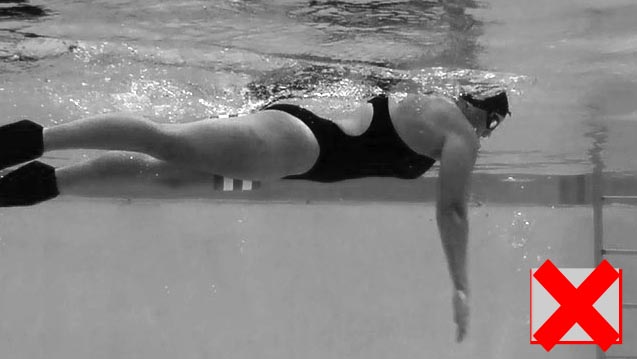
- Do you stroke with a “straight arm” by locking the elbow and driving the arm straight downward?
- Do you have more than 15-20 degree wrist bend angle?
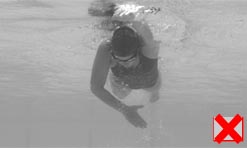
- Does your hand cross over the center line of your body (an inward S-stroke)?
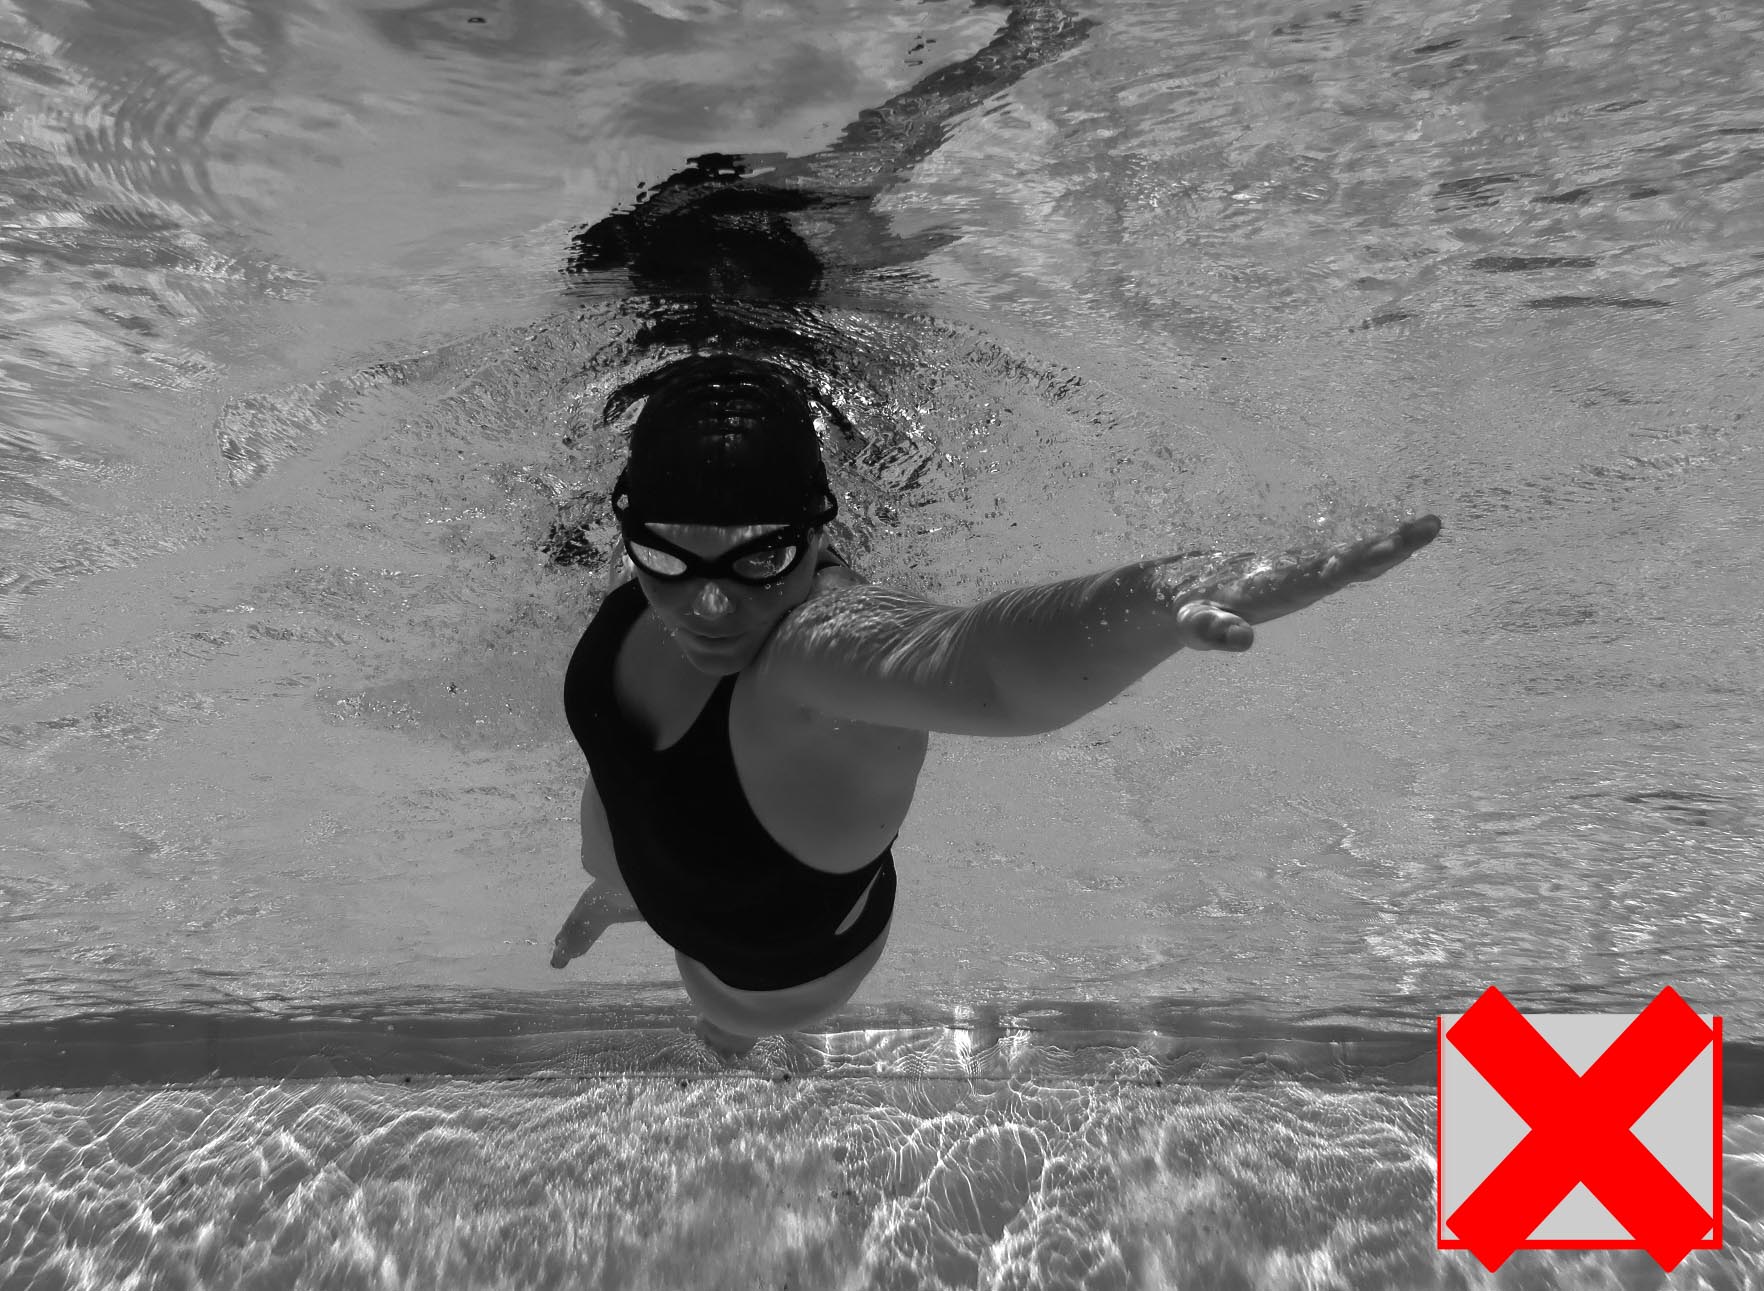
- Does your hand enter past the center of your head and sweep outward (an outward S stroke)?
- Does your hand enter the water out wide from the shoulders?
Fixes: Once you have determined which problems you have, use the following 2 drills with the correct paddles, a snorkel, and either a small kick and/or a pull buoy between your thighs
Comprehend:
– You may find that you have more than one of these stroke flaws. Use the drills and equipment prescribed below to solve each of the problems.
– Notice that your problems may only be isolated to particular arms or only when you breathe.
– Understand that you can mix-n-match the Glide Paddle on one hand and the Precision on the other hand to fix multiple problems at the same time.
Equipment selection for these drills:
If crossing over on entry or stroke – use the Glide Paddle in the stroking hand
If dropping your elbow on catch – use Precision on the stroking hand
If straight arm engagement – use Precision + Wrist Trainer + Power Pad on stroking hand
Drill 1:
Single-Arm Stroking, non-stroking arm up
Drill 2:
Single-Arm Stroking, non-stroking arm down
Stable “Lead Arm” While Breathing:
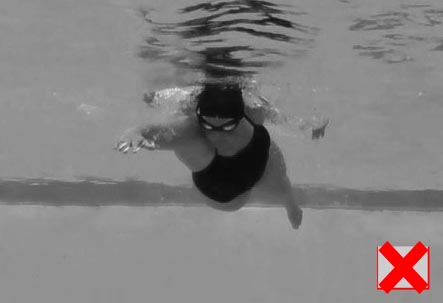
Comprehend: If/when you hesitate your front arm after it enters the water (or “glide”), it is common to have instability problems related to setting up the hand for the initial ‘catch’ and/or related to trying to stabilize yourself while breathing.
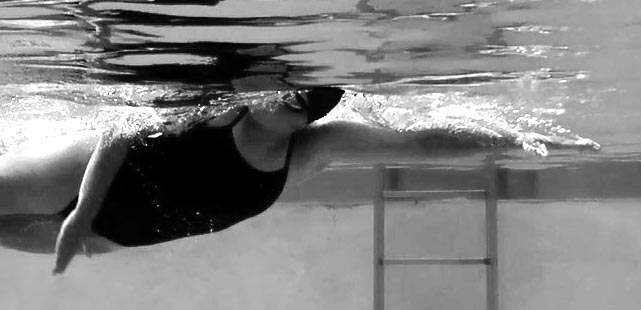
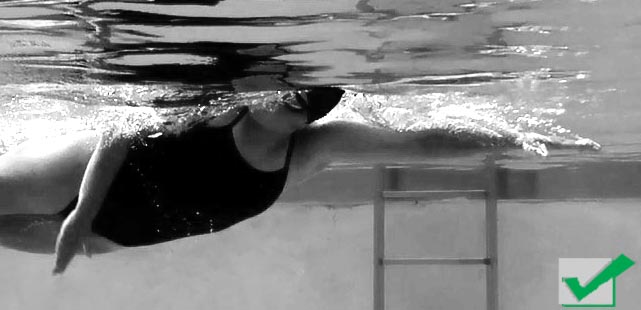
Goal: The lead arm should be stable directly in front of the shoulder as it enters and until it catches the water. It should not: a) ‘drift out’ away from the body; b) bend at the elbow and “lay on it” as you breath; or c) roll with the body as you breathe to cross over the vertical center line of your body position.
Self Analysis: Video yourself from front and the side for future reference.
Important: Be sure to have some video of your breathing to BOTH sides of the body
Finds: Review your recent video:
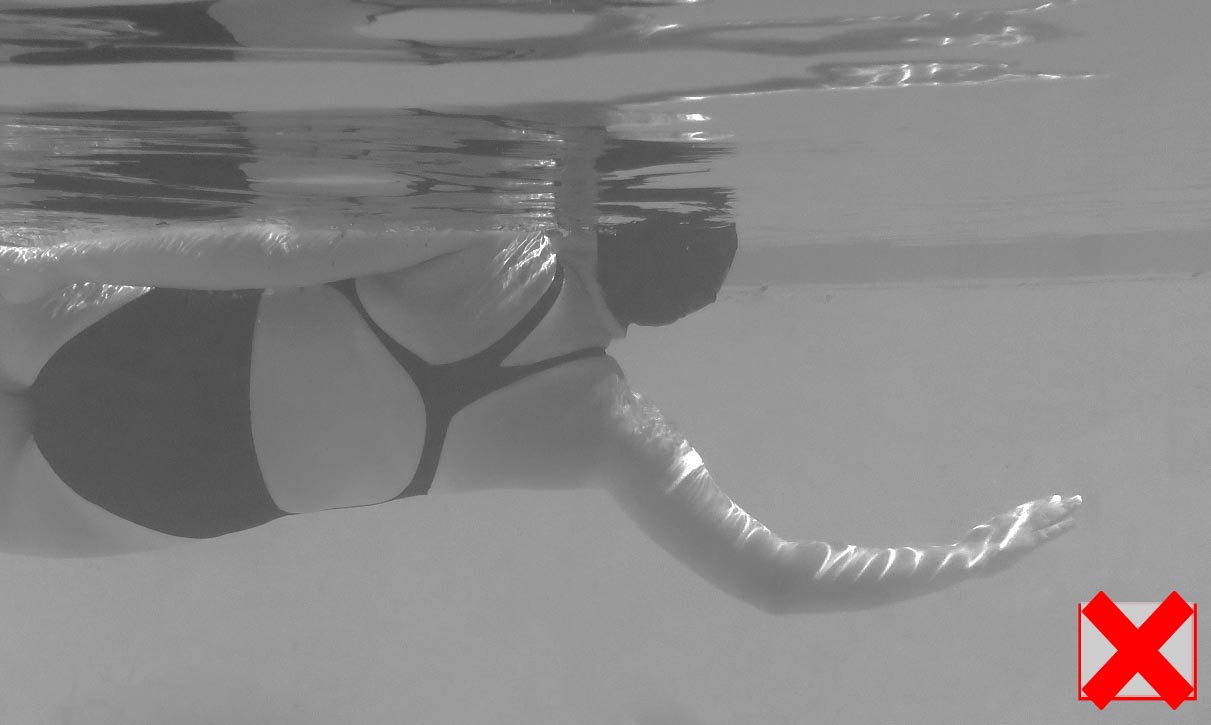
- Do you “rest” on your opposite arm while you breathe (bend the elbow and hesitate directly under the bicep)?

- Do you “sweep out” away from the body with the lead arm while you breathe?
- Does your hand and arm roll with your body and cross over the vertical line directly below your body?
Fixes: Once you have determined which problems you have, use the following two drills with the correct paddles, a snorkel, and either a small kick and/or a pull buoy between your thighs
Equipment selection for these drills:
– If crossing over on entry or stroke – Use the Glide Paddle on the stroking hand
– If sweeping out with lead arm when breathing to opposite side – use Glide Paddle on non-stroking arm
– If laying on lead arm while breathing – use Precision + Wrist Trainer + Displacement Pad on non-stroking arm
Drill 1:
Single-Arm Stroking, non-stroking arm up
Drill 2:
Single-Arm Stroking, non-stroking arm down